
Self-made bias tape: Make your sewing projects unique!
Are you ready to give your sewing projects the perfect finishing touch? Bias tape is the secret to making your edges truly eye-catching! But why settle for standard options when you can design your own bias tape? Don't worry, it's easier than you think!
What do you need? A bit of fabric scraps, a sewing machine, and a few simple steps. Perhaps you have some fabric remnants from your last project that are perfect for this. Soon you'll be creating your own designs on hems, edges, and necklines – all with a touch of personal creativity!
To make your own bias tape, you will need:
- Piece of fabric (not too small)
- Scissors
- Measuring tape or protractor triangle
- Iron
- Optional: Bias tape maker

Step-by-step to make your own bias tape:
Step 1: Cut the fabric
Let's start with a sharp cut! Fold your fabric diagonally so that a straight edge meets the selvedge.


Step 2: Sew the fabric strips together
Now it's time to join the strips! Place them at a right angle, right sides together, and head to the sewing machine.

After sewing, it's time to iron, iron, iron! Smooth the seams flat and trim any excess corners to get a long, even strip.
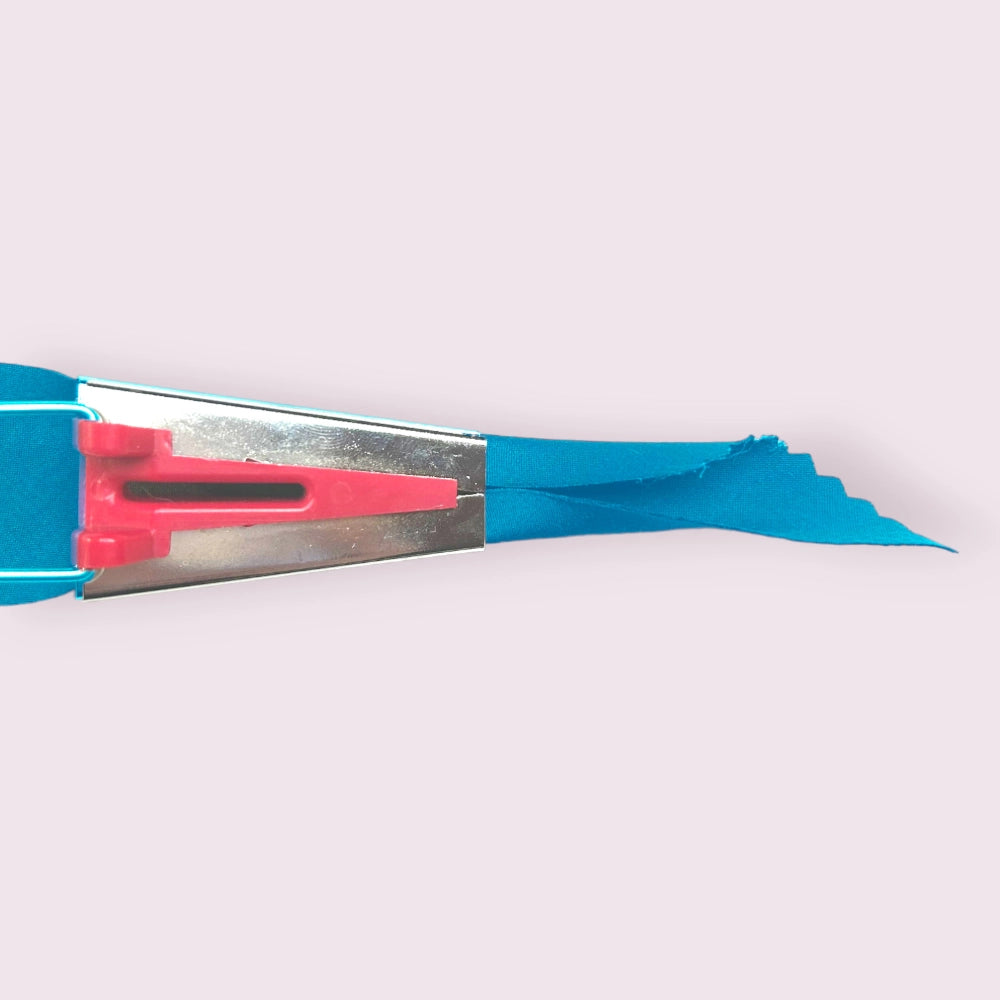
Step 3: Form the bias tape
Like a magician, we transform our fabric! Use a bias tape maker, insert the strip, and pull it through. Voilà! The edges are automatically folded. Iron the beginning a bit more firmly to set the folds. Then, step by step, carefully pull the entire length of the tape and iron it close to the bias tape maker until you reach the other end.

Step 4: Make bias tape without a bias tape maker
No bias tape maker? No problem! Fold the strip in half, ironing the edge flat. Fold the outer edges of the long side to the center and repeat the ironing. Finally, fold in half again and press flat.

You can also make piping in a similar way
Now it's time for decoration! Piping is one of the stars when it comes to enhancing sewing projects. Cut your fabric strips from diagonally cut fabric, just like for bias tape. Sew them together at a right angle, press the seams flat, and fold the fabric strip in half. Then move on to the next step!

Step 2: Insert cord
The secret lies in the cord! Place it in the center of the folded fabric strip...
