
No more fear of machine buttonholes
Buttonholes – a must for every sewing enthusiast. Even if it may seem intimidating for beginners at first, there are simple ways to master buttonholes with a sewing machine. In this guide, you will learn how to effortlessly create great buttonholes, adapted to the capabilities of your machine.
You can find out exactly which buttonholes your machine can make in the manual. Almost all household sewing machines can make at least the simple utility buttonhole. The higher quality and more modern the machine, the more likely it is to have other options in its repertoire, such as a keyhole buttonhole or a stretch buttonhole. Most sewing machines usually come with one (or more) buttonhole feet in their accessories.
Making buttonholes with a machine is much easier than you might think. However, since each machine functions slightly differently regarding settings and possibilities, it's definitely worth taking a look at the manual. Even for those of us who usually just start and only consult manuals when nothing else is working.
But before we can get started, we need to prepare a few things:
First, one layer of fabric is reinforced from the wrong side with fusible interfacing/web to prevent fraying and make the fabric more stable. In most patterns for blouses or coats, this is standard.

Fun-Fact: Did you know that historically, fasteners like buttons are on opposite sides for women and men? For women, it closes towards the heart, for men the other way around. There are different theories about this. One suggests that men had to draw their weapons quickly in battle, so the fastener closed towards the right side of the body to avoid getting caught in the buttons. Another theory says that noblewomen were usually dressed by maids, and closing the clothing was simply easier that way.
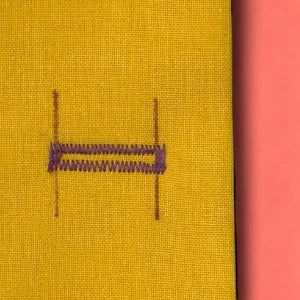
Step 1: Determine buttonhole length
Use the buttonhole foot on your sewing machine to determine the buttonhole length appropriate for the button diameter. Some machines also offer automatic settings for buttonholes. However, the required buttonhole length can also be calculated: measure the diameter of your button and add the thickness of the button. This gives you the required length of your buttonhole. Example: For a button with a 1.8 cm diameter and 0.3 cm thickness, the buttonhole length will be 2.1 cm.

Step 2: Mark position
Buttonholes are primarily placed perpendicular to the fabric edge. The buttonhole starts a few millimeters to the right or left of the front center, shifted towards the edge. This ensures the button sits exactly in the middle later. For blouses, however, they run parallel to the front edge. The button is placed at the top end of the buttonhole – also about 3 mm below the buttonhole opening. Transfer the buttonhole positions from the pattern to the fabric. Use tailor's chalk, a self-erasing marker, or hand stitches. It's best to double-check that all positions are correct. Working precisely here is very worthwhile.

Step 3: Sewing the buttonhole
At this point, you should take another close look at your machine's manual and also test a few buttonholes on a fabric scrap before placing your sewing project under the machine.
For a normal utility buttonhole, you usually start with the back bar tack and then sew the first length. This is followed by the front bar tack and finally the second length back to the start. Make sure that the longer sides of the buttonhole are sewn evenly and that the bar tacks are above/below the buttonhole length. If the bar tacks start within the buttonhole, it could become too short and the button might not fit through.
You might also have a machine that already has an integrated automatic buttonhole function. Then it's super quick. (By the way, after my training as a fashion designer, I didn't sew a single buttonhole with a machine for a very long time. I was too spoiled by the (industrial) automatic buttonhole machine that we had in our sewing room back then - position the garment, secure it, push the lever, done. That's why I'm always amazed today when I see how many options some household machines offer for buttonholes).

Step 4: Cutting open the buttonhole
Once the buttonhole is sewn, you can iron it if necessary. Last chance! Check everything again: Are all the buttonholes in the right place? If not, you can unpick and re-do the buttonhole at this point. It's tedious, but it's a better alternative to a crooked buttonhole or button on your finished garment.

If everything fits, carefully cut open the buttonhole in the middle. Use small, pointed scissors to get precisely into the corners and avoid damaging the buttonhole.
Feeling ready to go? Then get to your machine and have fun sewing!